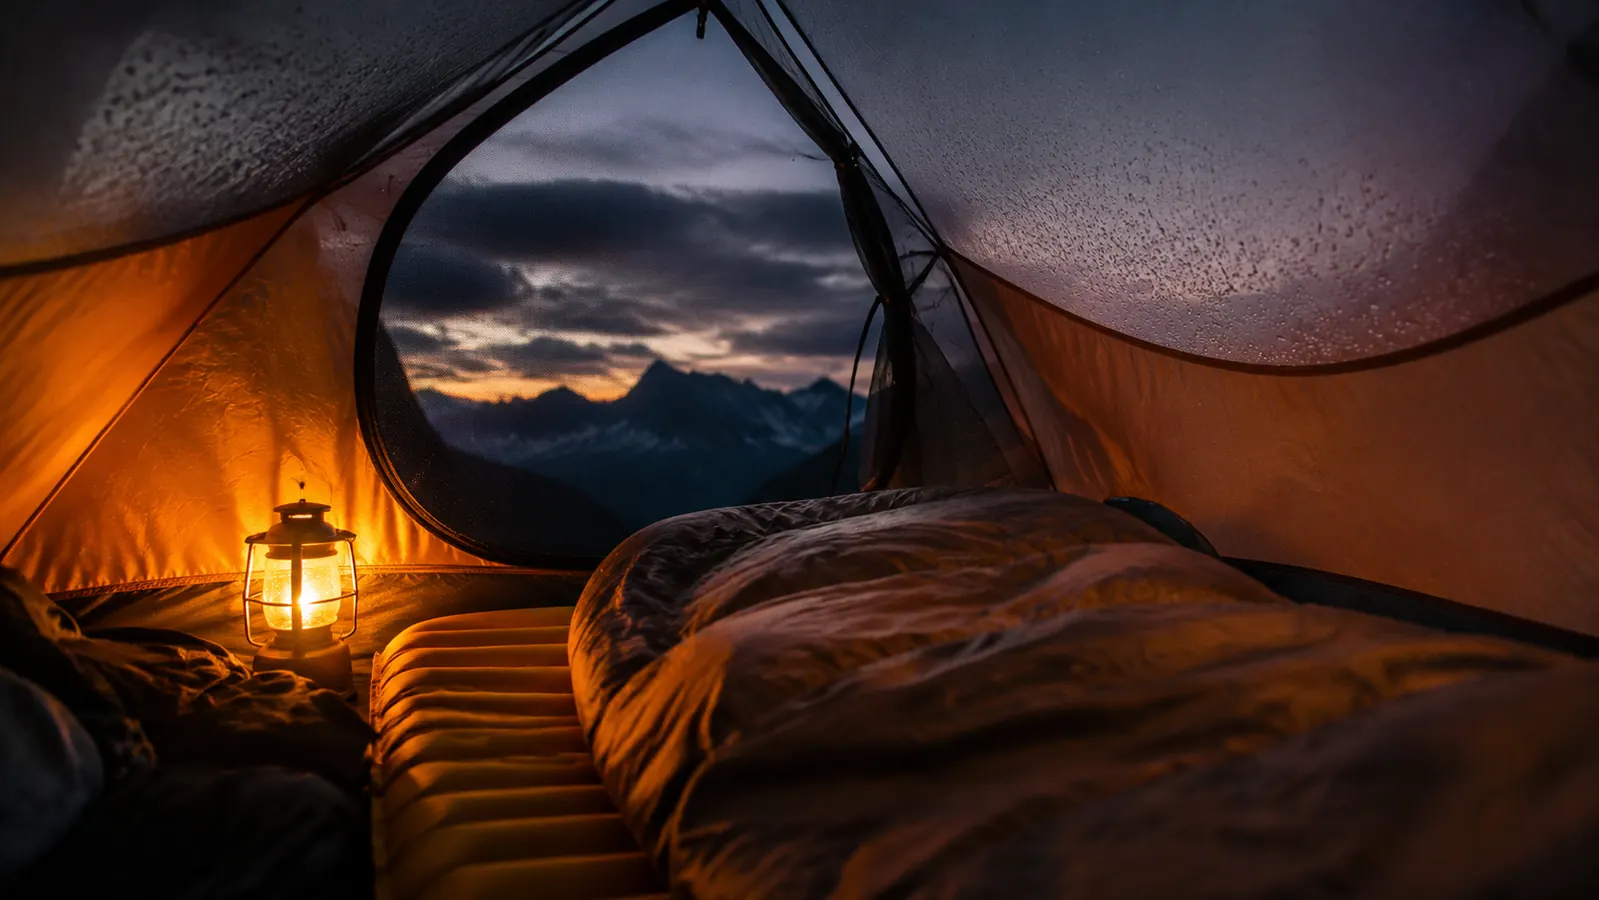
If you have woken up cold at 3 a.m. on a camping trip and immediately blamed your sleeping bag, you are looking at the wrong piece of gear. Ground chill is the real culprit. The earth pulls heat out of your body faster than cold air does, and no matter how well your bag is rated, it is doing almost nothing on the underside where it is compressed against a sleeping pad. The insulation loft that keeps you warm on top gets squashed flat underneath your weight. What is left to protect you from the ground is whatever your sleeping pad provides. If that pad has a low R-value, you will lose that fight every time.
I have had plenty of cold nights that a better sleeping pad would have fixed. I have also had warm nights in conditions that looked miserable on paper because my pad setup was dialed in. The five steps below are what I actually do now, from late September through early May. The self-inflating pad is the load-bearing piece. Everything else in this guide supports it.
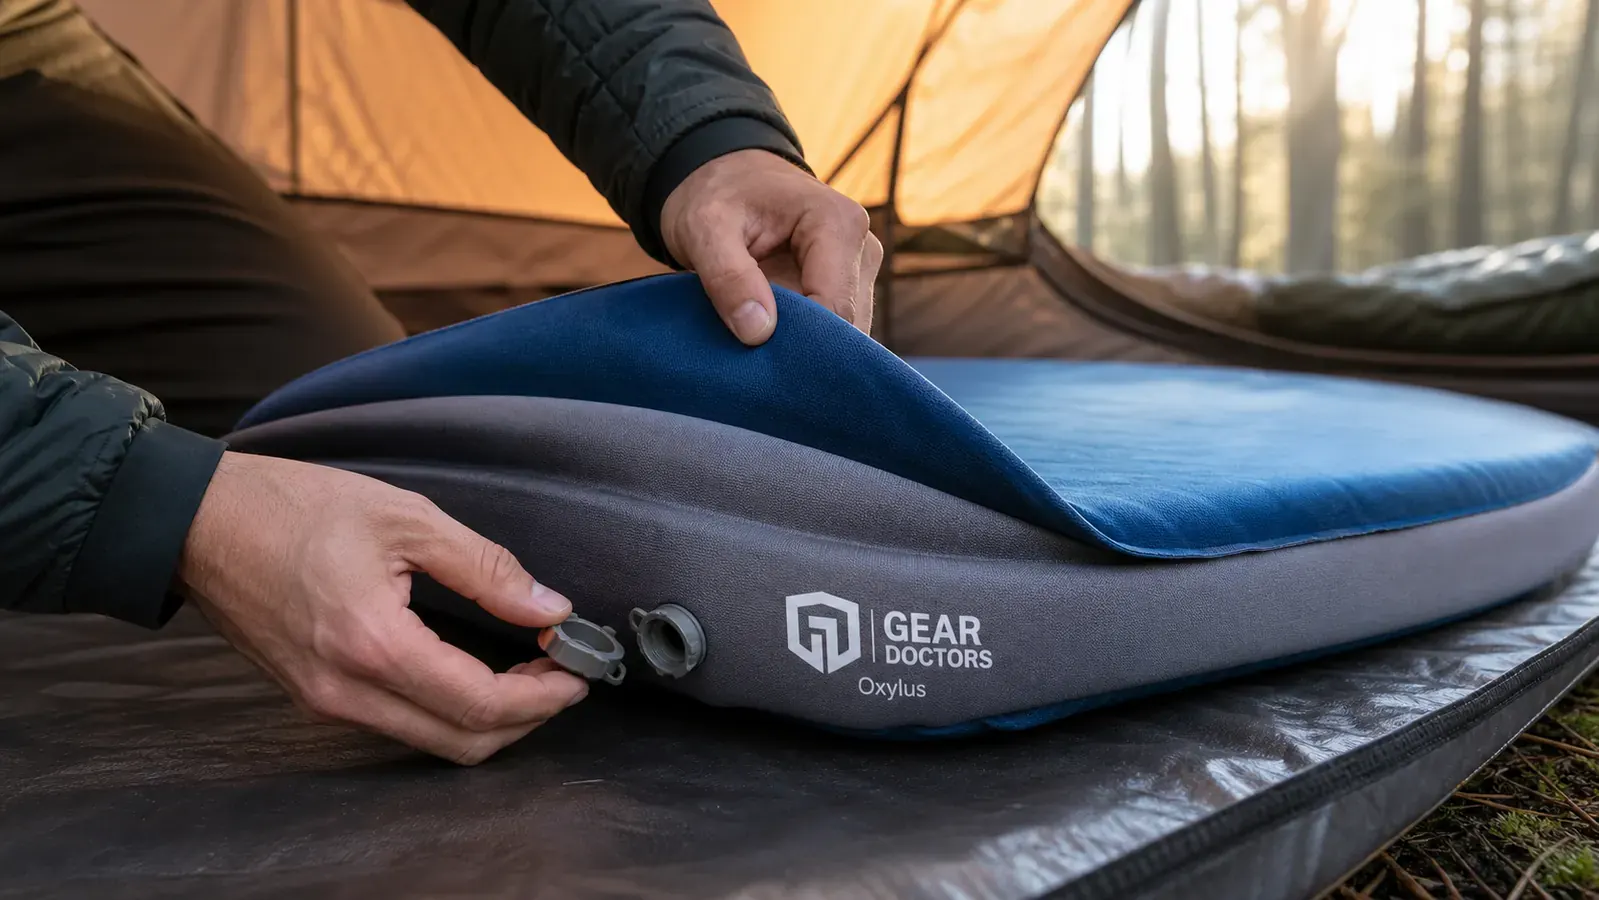
Still losing heat through the ground? This R-4.3 self-inflating pad is what Cole uses.
The Gear Doctors Oxylus Self-Inflating Sleeping Pad delivers R-4.3 ground insulation at a price that makes it hard to justify anything cheaper. Rated 4.5 stars across nearly 5,000 reviews, it self-inflates in minutes and packs down tight enough for car camping or a large pack.
Amazon Check Today's Price on Amazon →Step 1: Understand Why the Ground Is the Enemy
Conduction is the heat-transfer mechanism that gets you in trouble. When two objects are in contact, heat flows from the warmer one to the cooler one until they equalize. Your body is warm. The ground is cold. Without enough insulation between them, that exchange runs all night in one direction, and it is not in your favor.
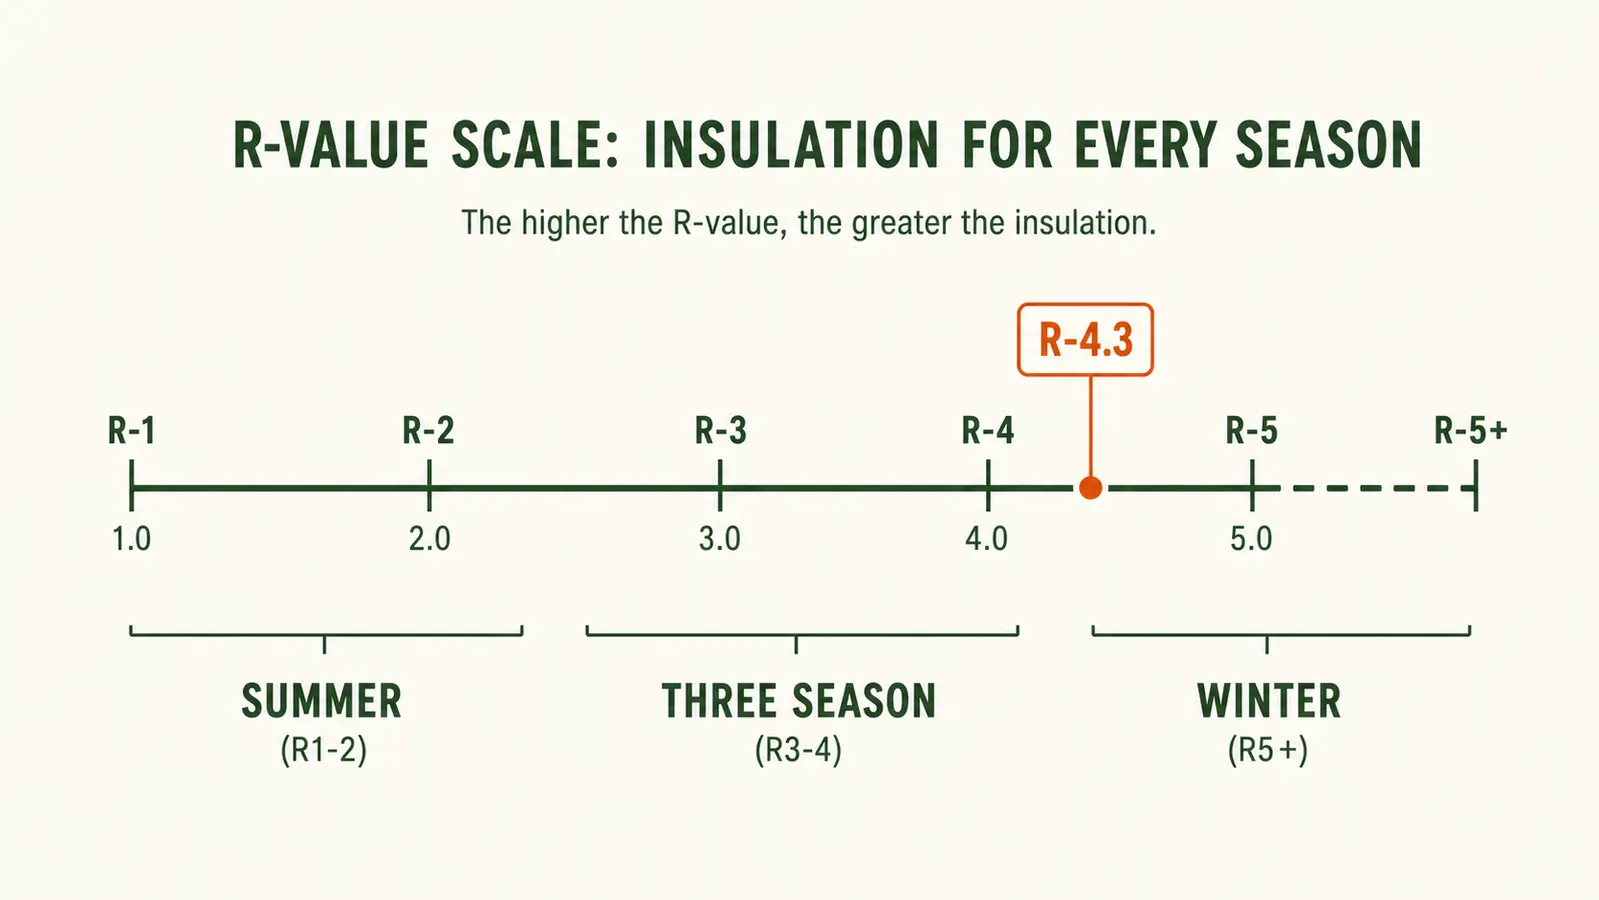
The metric that tells you how much insulation a sleeping pad provides is R-value. Higher is warmer. An R-1 foam pad from a discount store is barely better than sleeping on a yoga mat. A closed-cell foam pad from a reputable brand lands around R-2 to R-3. For three-season camping, including those shoulder months when overnight lows dip into the 30s and 40s Fahrenheit, you want a pad rated at least R-4. Below that threshold, you are counting on your bag to carry the whole load, and it cannot. The R-value floor for reliable warmth in cold conditions is not a suggestion from gear companies. It is physics.
Once I started treating ground insulation as its own line item in my kit, cold nights became a solved problem rather than a recurring argument with my gear. That shift starts with knowing the number.
Step 2: Choose a Sleeping Pad with a Real R-Value Rating
Not all sleeping pads have tested R-values. Some manufacturers self-report numbers that have never been verified against the ASTM F3340 standard, which is the consistent testing protocol the industry adopted in 2019. If the pad page does not mention the ASTM standard, treat the number with healthy skepticism.
For three-season camping, target R-4 or higher. The Gear Doctors Oxylus Self-Inflating Sleeping Pad comes in at R-4.3, which clears that threshold with a small margin to spare. That matters on a 28-degree night when you expected 38 degrees and the forecast got it wrong. The pad uses a foam core that expands when you open the valve, so inflation is mostly hands-off. A few breaths close the valve and firm it up to your preference. Deflation is straightforward: open the valve, roll from the opposite end, and the foam compresses back to a size that fits in the stuff sack.
Self-inflating pads occupy a useful middle ground between cheap closed-cell foam mats and expensive inflatable air pads. Foam mats are durable and impossible to puncture, but they pack bulky and most top out around R-2.5. Air pads can hit R-5 or higher and pack very small, but they are puncture-prone and provide zero insulation if they go flat mid-trip. A self-inflating foam pad gives you the insulation of foam in a smaller package, with the comfort of a slightly cushioned surface. For car camping and most backpacking contexts, it is the easiest call.
The sleeping bag gets all the credit, but the sleeping pad does all the actual work on the bottom half of your night.
Step 3: Pick a Campsite and Tent Spot That Works With You
The best sleeping pad in your kit still has limits if you pitch your tent in the wrong spot. Cold air pools in low-lying areas, so a hollow or depression in the terrain will read five to ten degrees colder overnight than a slightly elevated position nearby. Look for ground that is level, sheltered from wind on at least one side, and not the lowest point in a clearing or meadow.
Avoid pitching directly on bare rock when you have a choice. Rock conducts heat away rapidly and can be uneven enough to create pressure points that compromise your pad's insulation by compressing the foam unevenly. Flat dirt, pine duff, or grass all make better bases. If the ground is wet, a footprint or groundsheet under your tent adds a barrier between tent floor and moisture, which keeps the tent floor from acting as a secondary cold surface pressing up against your pad from below.
In dense forest, the canopy slows radiative heat loss from the ground and from your tent, so a treed site typically runs a couple degrees warmer than an open meadow at the same elevation. Meadows are scenic but exposed. If you are cold-weather camping and have a choice, trees win.
Orienting your tent door away from the prevailing wind direction also cuts down on cold drafts that can drop the interior temperature independent of ground chill. None of these steps replace a good sleeping pad. They just help your pad work closer to its rated potential.

Step 4: Match Your Sleeping Bag to Actual Overnight Lows
Sleeping bag temperature ratings assume you are sleeping on an insulating pad. The EN and ISO rating standards test bags this way. So if your pad is doing its job, your bag's rated temperature is a real number. If your pad is inadequate, your bag's effective temperature rating rises by however many degrees the ground is stealing.
A 20-degree bag on an R-4.3 pad in 35-degree overnight conditions is comfortable to warm. That same bag on a cheap R-1 foam mat in the same conditions is a miserable night. The pad multiplies the bag's effectiveness. Get the pad right first, then worry about the bag.
For the shoulder seasons in most of the continental United States, a 20-degree bag gives you a buffer for unexpected temperature drops. If you are camping in summer only, a 35-degree bag is usually enough. Do not overinvest in a 0-degree bag if you are not camping in genuinely cold conditions. A well-designed 20-degree bag paired with an R-4 or better pad handles more situations than most weekend campers ever need to cover.
Step 5: Optimize the Sleeping System Inside the Tent
A few small habits inside the tent compound the warmth your pad and bag already provide. Wear a dry base layer to bed. Even a thin merino or polyester top and bottom adds a few degrees and keeps perspiration from soaking into your bag's insulation overnight. Damp insulation is significantly less effective insulation.
Keep a warm hat accessible. A large fraction of heat loss happens through the head, and most sleeping bags do not have an integrated hood tight enough to fully address this. A simple beanie added on a cold night changes the equation. If it warms up, you take it off. If it stays cold, you are glad you had it.
Put tomorrow's clothes in the foot of your sleeping bag before you sleep. Nothing is worse than pulling on a cold base layer in the morning. Letting your body heat warm those clothes overnight costs you nothing and makes mornings tolerable. Tuck a water bottle filled with hot water into the bag near your feet before you get in if temperatures are dropping below 30 degrees. It works better than most people expect.
Eat a small, high-fat snack before bed. Fat takes longer to metabolize than carbohydrates, so your body generates a steady low-level heat output through the first few hours of sleep rather than burning through quick carbs and stalling out. Peanut butter, cheese, nuts, or a spoonful of olive oil on bread all work. This is not a dramatic intervention, but it is a real one, and it costs nothing.
Do not wear the same socks to bed that you hiked in. Even if they feel dry, they have absorbed sweat during the day and that moisture will pull heat away from your feet all night. A clean, dry pair of wool socks kept in the sleeping bag for this purpose is a small habit that makes a real difference on cold nights below 35 degrees.
What Else Helps
If you are camping in temperatures below 20 degrees regularly, a vapor barrier liner inside your sleeping bag can meaningfully extend warmth by blocking moisture transfer from your body into the insulation. It is not comfortable in mild conditions but effective in hard ones. Experienced winter campers use them.
A second thin closed-cell foam pad layered underneath your main self-inflating pad adds R-value without adding much weight or cost. This is a common backcountry trick for extending a three-season pad into genuine winter conditions. A cheap closed-cell foam pad from any outdoor retailer gets you there without replacing your primary pad. The layered R-value is additive: an R-4.3 self-inflating pad stacked on an R-2 closed-cell mat gives you a combined insulation value around R-6, which handles most non-alpine winter camping.
If ground moisture is a recurring problem at your campsites, a seam-sealed tent footprint is worth carrying. It is not a warming tool, but a wet tent floor transfers cold through to your pad regardless of how well the pad itself is rated. Keeping the tent floor dry maintains the integrity of everything above it.
For more detail on why R-value is the single most important number on a sleeping pad, the internal guide on 10 reasons R-value matters covers the breakdown by season and temperature range. For a full review of how the Gear Doctors Oxylus performs across real camping conditions, the Gear Doctors Oxylus sleeping pad review covers long-term comfort, durability, and pack size in detail.
Layering closed-cell foam under your self-inflating pad is the cheapest R-value upgrade you will ever make.
The Gear Doctors Oxylus is the self-inflating pad Cole trusts when overnight lows get serious.
R-4.3 rated insulation, foam self-inflation with a manual top-off, and a durable surface that has held up across dozens of trips from desert spring to rainy PNW fall. At current pricing, it is hard to justify a cheaper pad for three-season camping when this is the alternative. Over 4,700 campers have rated it 4.5 stars.
Amazon Check Today's Price on Amazon →