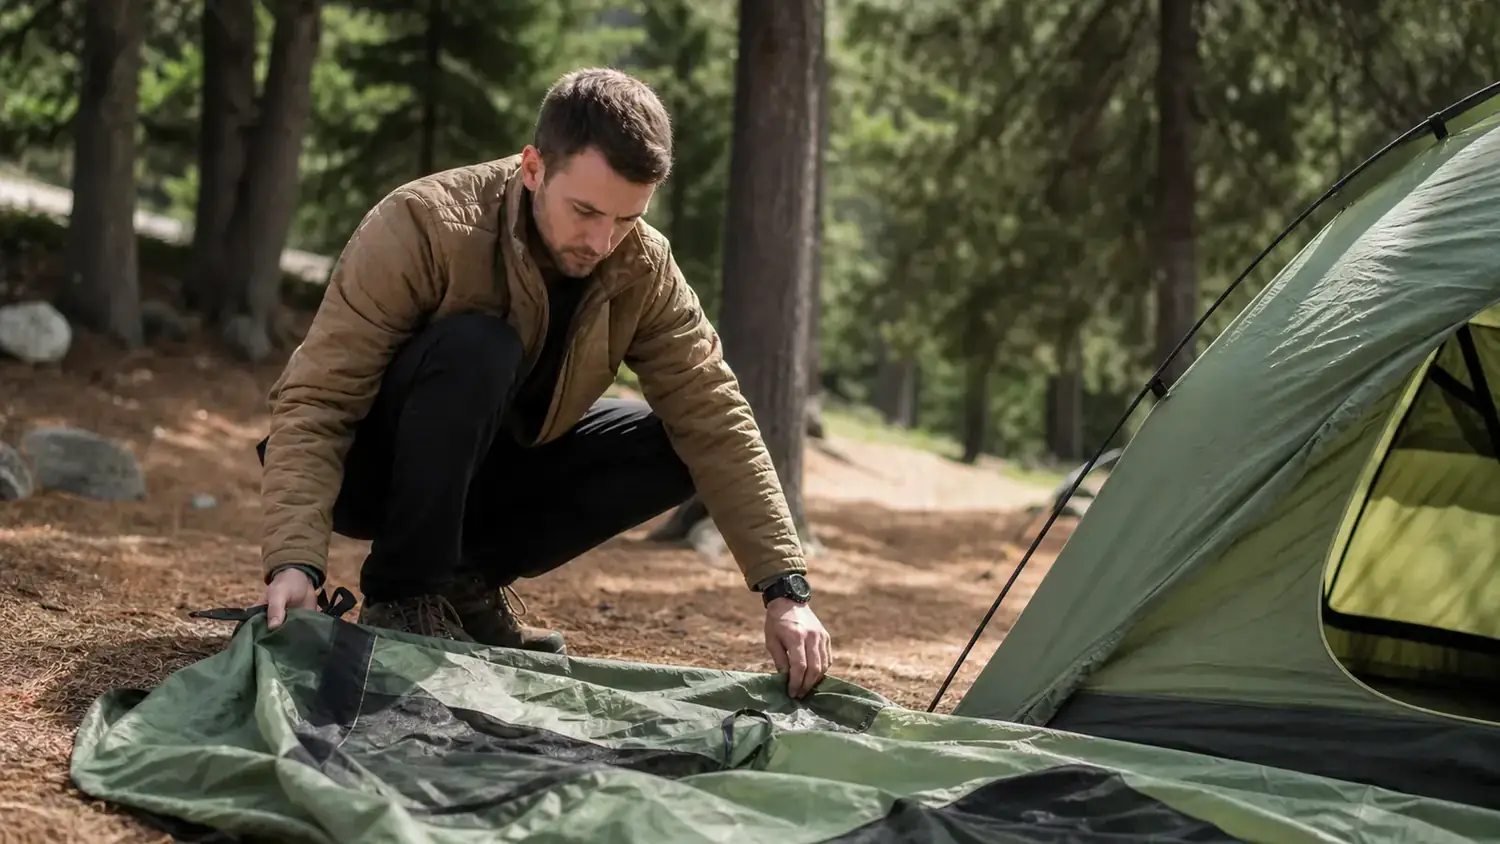
Setting up a 4-person dome tent solo is not hard. It just looks hard the first time, when the poles are loose on the ground, the tent body is doing its best impression of a tarp in the wind, and you have no idea which end is the door. I have been there. I have also set up the same tent in 11 minutes alone, in the dark, after a four-hour drive. The difference is not strength. It is sequence.
This guide covers the exact order of operations for pitching a freestanding dome tent when you are the only person at camp. The method works for any crossing-pole freestanding camping tent in the 4-person range, whether you have a simple two-pole dome or a three-pole design with a small vestibule. This guide uses the Coleman Sundome Dark Room 4-person as the reference tent throughout, but the sequence works for any freestanding dome. The core principles are the same across the category: anchor the floor first, raise the poles from a fixed point, tension the clips before you stake out, and never skip the guy lines no matter how clear the sky looks at 7 p.m.
The Coleman Sundome uses a two-pole crossing design, which is by far the most common configuration in the car camping category. If your tent uses a hub-and-strut system with four or more poles, the order of operations is slightly different. But the site prep, the footprint anchoring, the fly attachment, and the guy-line steps are identical regardless of pole count. Start here and adjust for your specific tent where needed.
Always pitching alone? Use a tent that fights you less.
The Coleman Sundome Dark Room has a two-pole crossing system that stays upright the moment you clip it in. No assistant required. Check today's price before your next trip.
Amazon Check Today's Price on Amazon →Before You Start: Site Selection and Gear Spread
Pick your site before you unzip the tent bag. Look for ground that is level within a few inches, clear of sharp rocks, pinecones, and anything with a stick up. A five-minute site walk saves you from a 2 a.m. backache. If you are on a slope, note which direction is downhill. You want your head uphill when you sleep, so orient the tent accordingly before you do anything else.
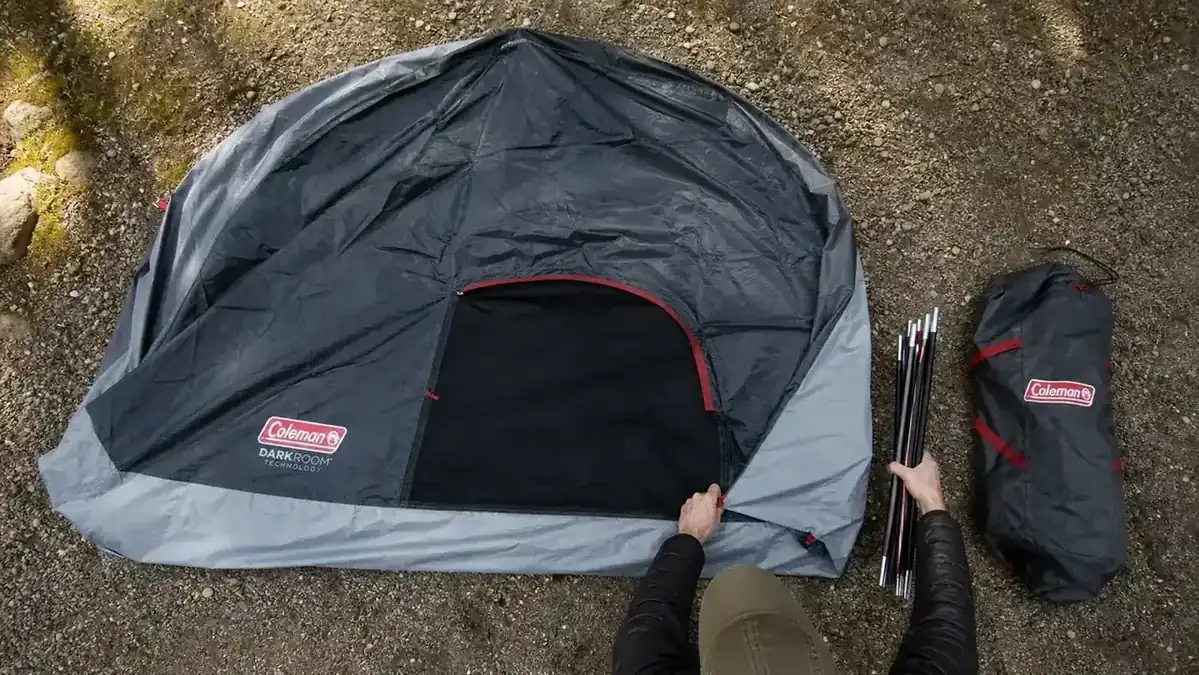
Once you have a spot, lay the tent bag down and pull everything out. Separate it into four piles: tent body, poles in their bag, stakes, and rainfly. Do not unroll the tent yet. Just confirm all four piles are there. Nothing is worse than getting halfway through setup and discovering the stake bag is still in your car.
Step 1: Clear and Stake the Footprint
If you are using a footprint or ground cloth, lay it down first and stake two corners temporarily. This keeps it from sliding while you work. If you are going footprint-free, mentally mark the four corners of where your tent floor will land. The tent floor on a standard 4-person dome is roughly 9 feet by 7 feet. Pace it out. Make sure nothing is going to punch through the floor from below.
Temporarily staking the footprint corners before you unfurl the camping tent body is the single biggest time-saver in solo setup. It gives you a fixed anchor so the whole assembly does not migrate downhill while you are threading poles. Even two stakes on the uphill corners make a difference. I use this trick every time, regardless of wind.
Step 2: Lay Out and Orient the Tent Body
Unfold the tent body on top of the footprint or cleared ground with the floor down and the door facing the direction you want. Pull it to the corners so it is flat and roughly in position. The tent body should be relaxed, not bunched. Corners should be at the corners of the footprint.
Orientation matters more than most people think. Point the door away from the prevailing wind if you can judge it. On exposed sites, you want the tent wall, not the door zipper, facing into wind-driven rain. At wooded sites this matters less. Either way, decide now because once the poles are in, you are committed.
Now connect your poles. For a standard crossing-pole dome tent, you will have two main poles of the same length that slide through sleeves or snap to clips in an X pattern. Assemble both poles fully on the ground before you touch the tent. Shock-corded poles snap together; just follow the angles. Do not force them. Lay both fully assembled poles beside the tent.
Step 3: Thread and Cross the Main Poles
Pick up the first pole and thread it through the longest sleeve on the tent body, or begin clipping it to the clips from one corner to the opposite corner diagonally. Start at one corner and work to the other. Keep one end of the pole on the ground while you work so it does not spring loose. Once you have the first pole threaded corner to corner, clip or pin both ends into the corner grommets or foot rings. The tent body will start to form a low arch.
Do the same with the second pole, crossing over the first at the center. This is where a solo setup gets interesting. The tent wants to slide toward you as you push the second pole through. Use your knee or a foot to hold the tent body flat at the far corner while you push the pole through from the near side. Once the second pole is crossed and both ends are seated in the grommets, the tent will pop up into a dome shape on its own. That is a good sound.
Step 4: Clip, Tension, and Stake the Body
If your tent uses clips instead of sleeves, work around the tent body clipping each one to the pole. Start at the corners and work toward the center. Pull each clip snug so the tent fabric is taut against the pole. Loose clips mean a floppy tent wall, and a floppy tent wall flaps in wind and holds rainwater in little pockets on the outside.
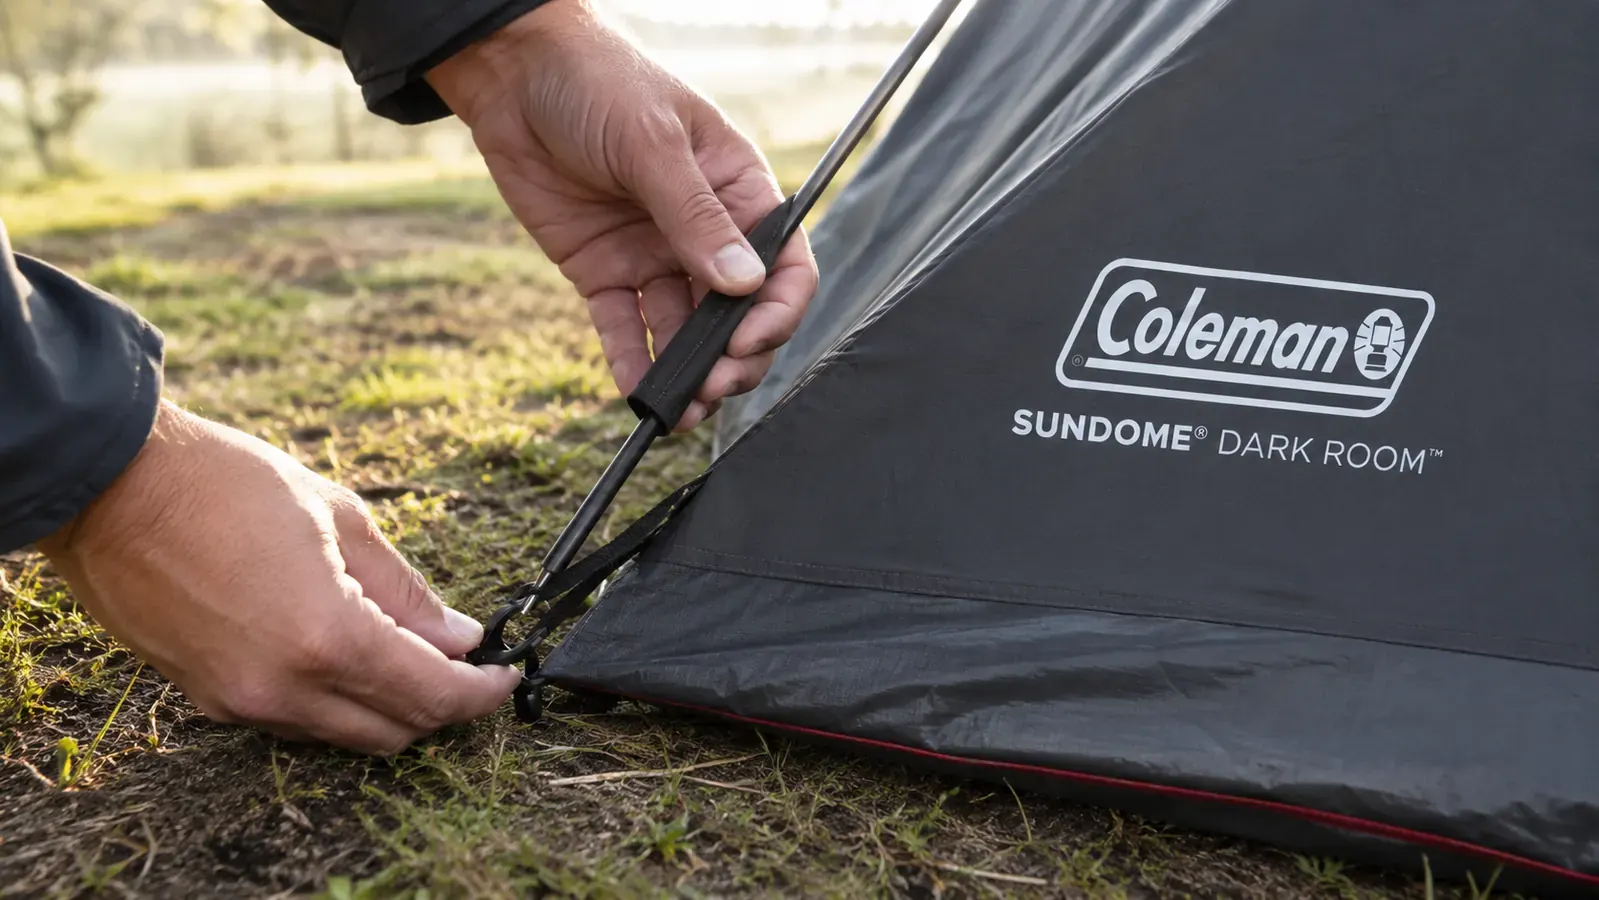
Now stake out the four floor corners. Push each stake through the corner grommet at roughly a 45-degree angle, leaning away from the tent. Snug tension on the floor keeps the tent from sliding off its footprint and improves interior space. On hard ground, a rock to tap the stake in is fine. On sand, use the Y-shaped stakes from your kit rather than the standard pins. They hold much better.
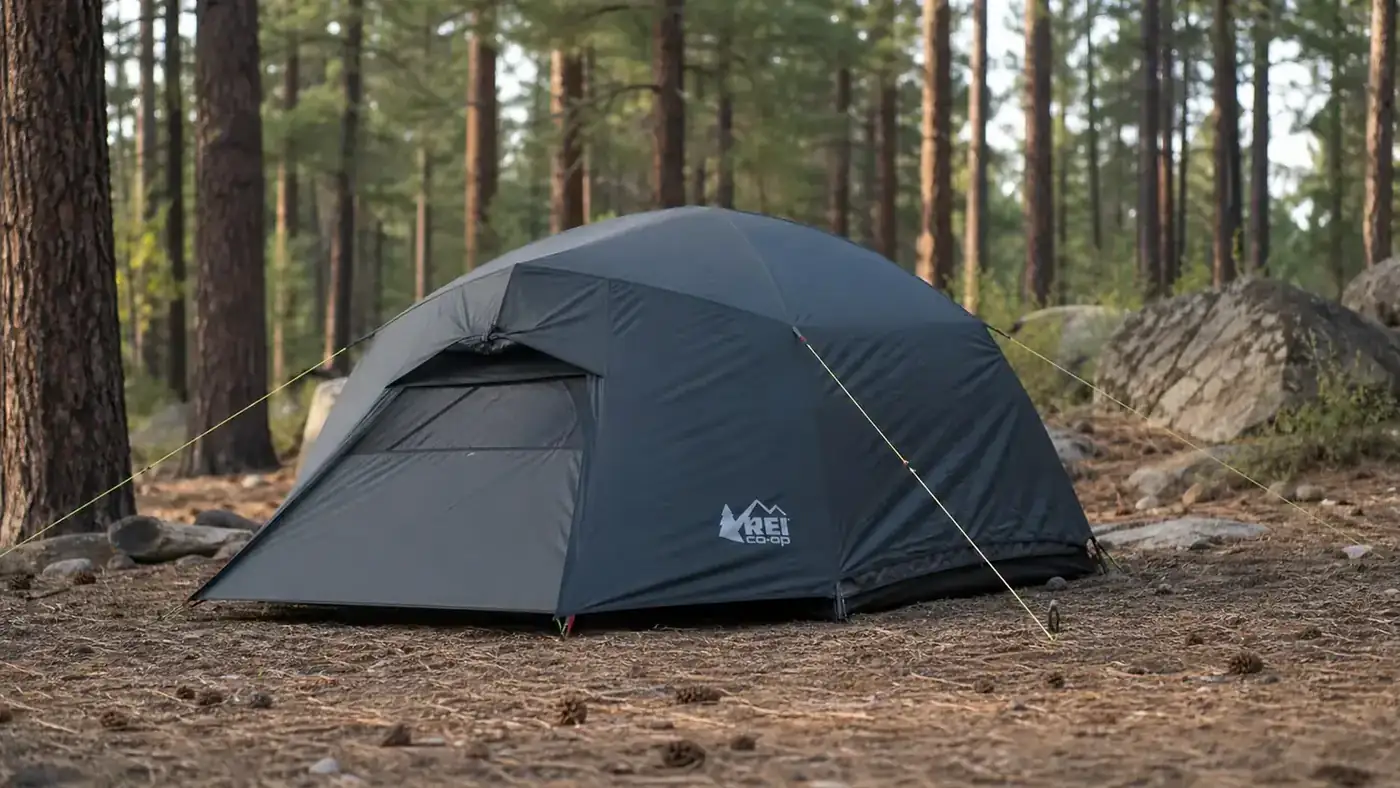
At this point you have a standing tent. If there is no wind and no rain in the forecast, you could stop here and call it done. But the rainfly and guy lines are not optional extras. They are what keeps you dry and what keeps the tent standing in a gust at 2 a.m. Do not skip them.
Step 5: Attach the Rainfly and Run the Guy Lines
Drape the rainfly over the tent with the door cover matching the tent door. Most flies have color-coded corners or labeled tags to take the guesswork out. Clip the fly attachment points to the pole ends or the tent corners, then clip any center straps to the pole crossing in the middle. Pull the fly down evenly so there is a gap between the fly and the tent body on all sides. That gap is your condensation management. If the fly is touching the inner tent wall, moisture from your breathing will wick through.
Now the part most people skip: the guy lines. Every camping tent with a rainfly has attachment points on the fly for short pieces of cord. Hook them up and stake them out at a 45-degree angle from the tent. You do not need a gale to make this worth doing. A 15 mph wind at 3 a.m. will turn an unstaked fly into a drum kit outside your head. Three minutes now saves a miserable night. For extra stability, guy out the pole tips if your tent has those attachment points. This triangulates the pole and stops side-to-side rocking.
The guy lines are not optional extras. They are what keeps the tent standing in a gust at 2 a.m. Three minutes now saves a miserable night.
What Else Helps with Solo Setup
Use the tent bag as a weight. Set it on the tent body before you raise the poles and it keeps one end from sliding away from you. That trick sounds small but it genuinely changes solo setup on breezy days. A half-full water bottle works just as well.
Choose the right tent for how you actually camp. If you routinely arrive first, set up alone, and pitch in marginal light, a tent with a two-pole crossing system is significantly easier than one with three or four poles and a complex hub. The Coleman Sundome Dark Room 4-person is a consistent recommendation for solo setup precisely because the two-pole crossing is forgiving. The poles are shock-corded, the clip system is fast, and the rainfly goes on in under two minutes once you have done it once. It is not the lightest tent or the most weatherproof at the edges. But for car camping and weekend trips where ease of setup is a real factor, it earns its spot in the trunk.
Know your pole lengths before a trip. Most dome tents use poles of identical length for the main cross. But some tents have a shorter ridge pole or a vestibule pole that looks nearly identical to the main poles until you try to fit it into the wrong sleeve. Lay the poles out at home and label the bags if needed. A five-minute exercise at home prevents a 20-minute puzzling session at camp with failing light.
Practice at home at least once. Set the tent up in your backyard before your first trip of the season. You will find the worn grommet, the sticky zipper, and the missing stake now, not at the campsite. You will also cut your real-world setup time by a third on the first trip.
Carry a small headlamp in your pocket, not in your tent bag. On trips where you are setting up in fading light, you want the headlamp immediately accessible, not buried under the rainfly inside the tent bag. Wherever it is, it needs to be reachable before the dome is up.
A Quick Note on Wind and Uneven Ground
Wind is the main variable that makes solo setup harder. It is not unsafe, just annoying. The countermeasure is to stake your first two corners before doing anything else. Staked corners give the tent body an anchor it cannot blow away from. Clip from those staked corners toward the center, not from the center out. This is the opposite of how most people instinctively work, but it is faster when the tent keeps trying to drift.
Uneven ground is a bigger issue for sleep quality than for setup. If you are on a slope greater than a few degrees, the tent body will pool toward the low end and floor tension will be uneven. Stake the uphill corners first and work downhill. If the slope is bad enough that the tent floor is wrinkled even after staking, move the site. A wrinkled floor means your sleeping pad is going to fold and you are going to wake up at 3 a.m. on your side against the tent wall.
Read this guide. Now get a tent that rewards the prep.
The Coleman Sundome Dark Room 4-person has a two-pole crossing system, fast clip attachment, and a rainfly that goes on in minutes. It is what Cole actually pitches solo. Check today's price and see if it is the right fit for your next trip.
Amazon Check Today's Price on Amazon →